
When I first saw this challenge posted, my first thought was, “oh holy crap no, there’s no way I can make that, I’m skipping this month,” but then I shook myself off and started thinking about fillings. The fillings got me going and as I read through the recipe, it actually didn’t seem that hard. Watching the video helped immensely (thanks to our hosts for providing that link) and I found other videos on Youtube that helped as well. I was starting to get excited about this recipe.
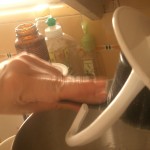
I ran into a few small snags. One was the weather here in Los Angeles. It was so hot I was calling in it Hell A instead of L.A. I worried that my dough wouldn’t hold the butter so I kept putting it off, hoping for cooler weather. One morning I woke up and decided to head off to Silverlake for ingredients. I neglected to check the weather and only when I was there did I find it was 110 degrees! Still I was dressed for the weather and determined to get what I needed. It turned out to be quite the odyssey.
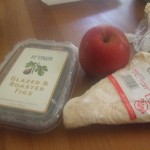
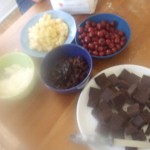
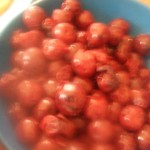
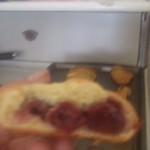
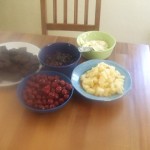
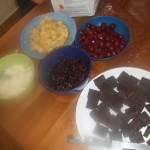
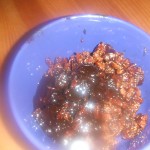
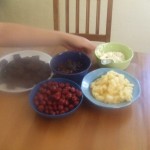
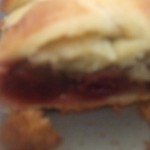
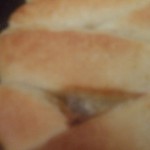
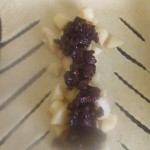
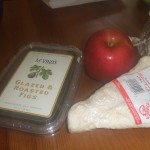
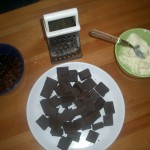
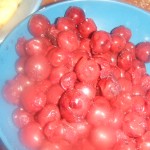
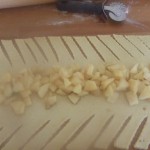
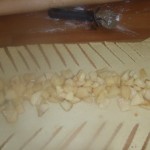
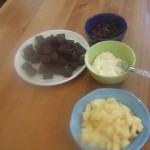
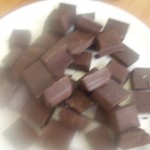
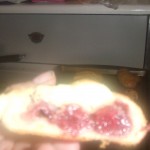
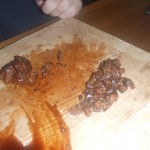
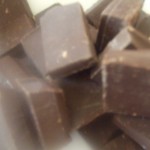
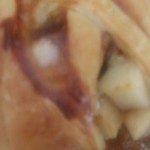
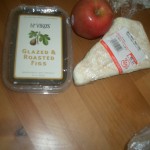
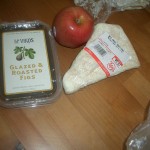
For my fillings I wanted one to have something to do with these amazing glazed, roasted figs I had found a few months ago at The Cheesestore in Silverlake. I was lucky and found the one package they had left which caused a bit of consternation. Would it be enough? I quickly decided that chopped Fuji apples would be great with the figs and Brie and would augment my small quantity of the figs. The second braid would be filled with brandied cherries and dark chocolate, a little homage to someone I care deeply about whose favorite cake is Black Forest. To find out more about my crazy day hunting ingredients in 100-degree weather, check out my L.A. Journal.
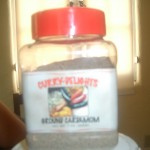
I also sweet-talked my brother into taking me on a separate day to the Indian store I love in Los Feliz. They have a huge selection of spices and I was happy to find several varieties of cardamom. The proprietress let me snap away pictures at will in the store and seemed to be amused by my desire to do so. I have to go back, I completely forgot rosewater to try my hand at macarons ala Pierre Hermes.
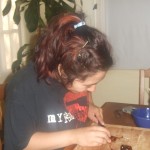
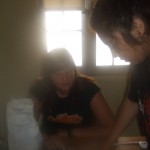
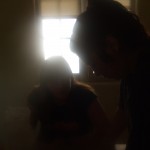
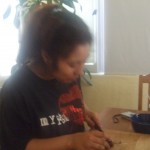
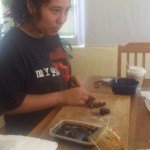
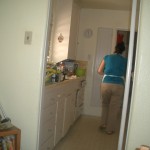
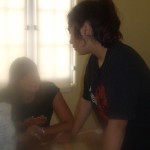
Finally, a cooler day arrived and I was eagerly anticipating my baking. I gathered up my ingredients and three teenagers (my niece Arielle, my nephew Jesse and their friend Debbie who are out on summer break) and set off for last minute ingredients. We put off the dough for one more day and hung out a bit until they went off to the movies. The next day my brother Jesse dropped three sleepy teenagers off at my house and left whistling. I dubbed them Daring Baker Dude and Bakerettes and put them to work. Arielle grated orange rind, Debbie handed me flour and Jesse did a last minute store run for more flour. They all got to sniff the cardamom that I had found in cheaply at an Indian store in Los Feliz and I got to give a little impromptu class on spices, dough, yeast proofing and other fun tidbits. I found I really like teaching teenagers to bake! It helps that they were into it, interested and eager to learn. (If my brother is reading this, it does not mean your kids can hang at my house all summer long).
We watched movies in between the turns and hung out in my room checking out my books, which made the waiting easier. I had help rolling out the dough and when we put it in the fridge for the last time they went home.
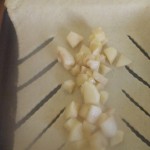
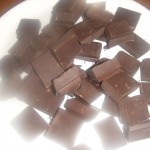
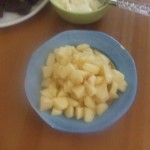
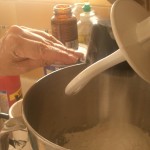
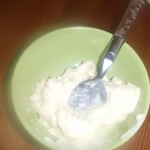
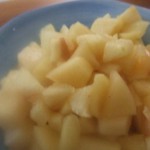
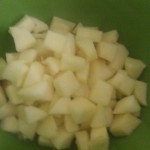
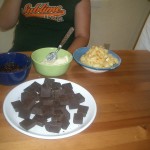
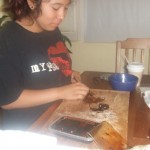
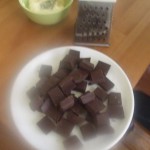
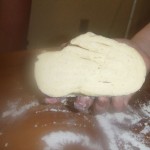
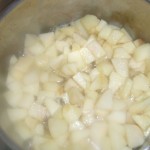
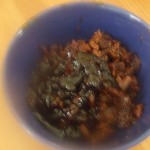
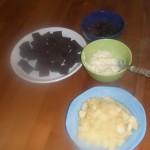
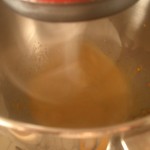
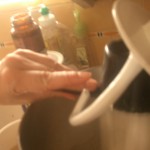
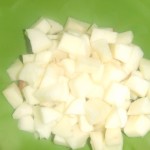
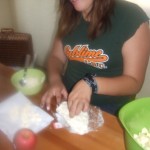
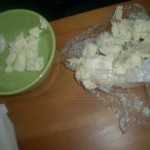
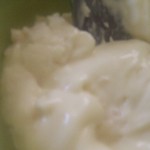
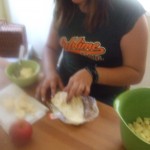
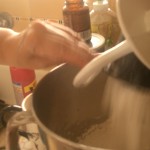
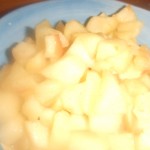
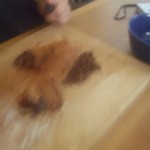
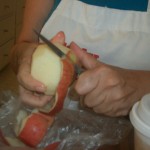
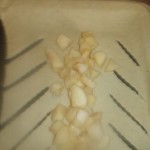
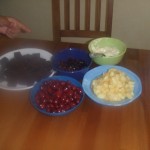
The next day my brother arrived with two of the three teenagers bright and early. He brought coffee and croissants but I wanted to wait for the Danish. I put Debbie to scoop out Brie into a bowl and Arielle to chop the figs. I peeled and cubed apples, then caramelized them at set them to cool. I also drained the cherries and Arielle and Debbie chopped chocolate into cubes.
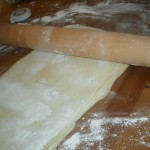
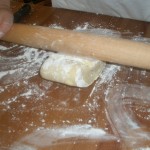
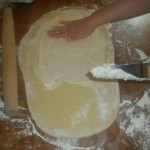
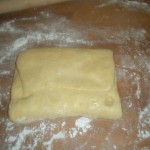
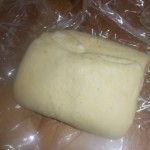
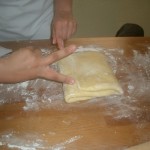
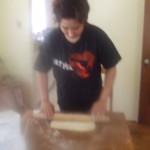
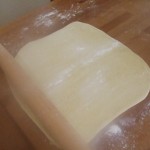
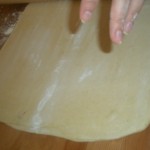
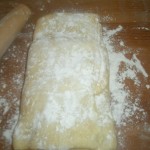
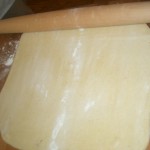
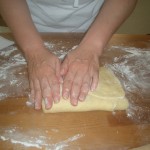
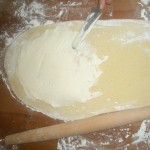
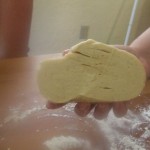
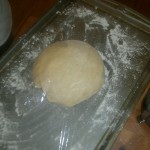
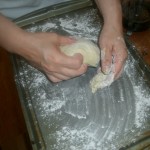
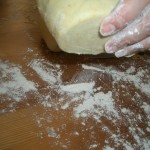
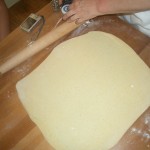
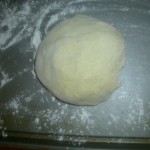
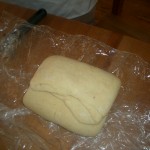
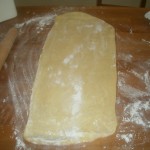
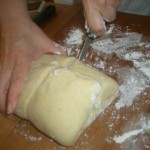
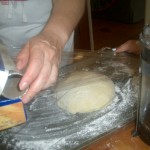
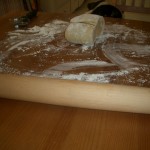
We took the dough out of the fridge and started rolling and measuring with my tape till we got it the right size. At one point, the dough started shrinking back and we left it to sit for a bit, which worked like a charm.
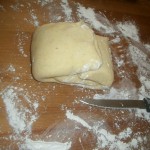
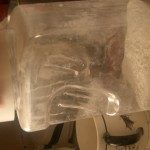
Debbie and Arielle were particularly interested in the buerrage or butter block. I also explained the English method of grating the butter, which we will probably try next time we make this. The idea of grating butter appeals to all of us.
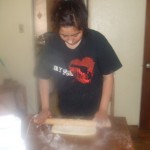
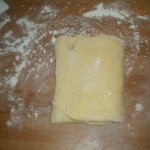
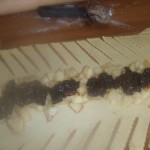
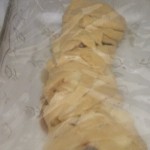
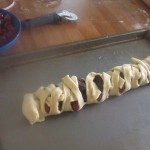
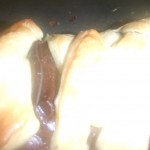
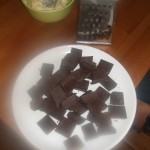
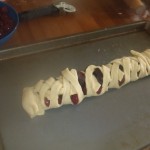
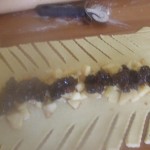
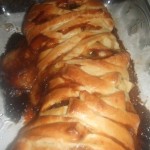
Once the dough was ready he girls and I had lots of fun making the braids and filling them. We worried that the chocolate would melt all over but it held. Arielle was disgusted that I put stinky French cheese in a Danish and “ruined” perfectly good apples and pastry. We argued good-naturedly about the cheese and I couldn’t persuade them to like it. One day they will love stinky cheese. Good thing I didn’t use Gorgonzola or another blue, they’d have freaked out totally.
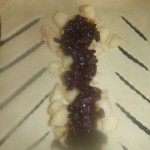
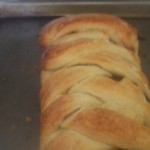
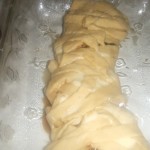
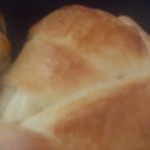
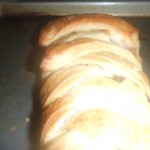
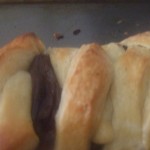
We watched Fur while waiting for the braids to rise and what a weird movie that was. I guess I should have screened it first. While the girls were watching, I snuck in and put a braid in the oven and soon the whole house was redolent with the incredible smell of cardamom, orange, vanilla, cherries and baking chocolate. The aroma was the most hedonistically gorgeous thing I’ve smelled in a long, long time. Oh yeah, I’m making this again.
The cherry-chocolate braid that I named Mark’s Black Forest Danish was a huge hit with the girls and they happily bagged it up to take home, while avoiding the fig, apple and cheese one. We had had some trimming dough left over and they used ever bit of it making tiny little Danishes, some with just a single cherry wrapped in dough that Debbie dubbed Cherry Poppers. They took those home too and set off with a bag full of goodies. My brother called and asked for me to make the dough again so he could have it just plain with no filling. I will in the fall when it’s cooler – I won’t attempt it in summer time again.
All in all, we had a blast and ran into no problems with the dough other than sore arms from all the rolling. It’s a lot easier than it looks and so incredibly good. It helps to have two or three teenagers around to lighten the load and make it more fun. I never would have attempted this without the incredible Daring Bakers by my side and for that I am grateful.
Many thanks to our hosts Kelly of Sass & Veracity, and Ben of What’s Cookin’? They provided so much good info and instruction!
Don’t forget to visit The Daring Bakers in their new forum and The Daring Bakers Blogroll to see everyone’s braids.
Technique: Making and working with yeasted laminated dough
Recipe: “Danish Braid” from Sherry Yard’s The Secrets of Baking
DANISH DOUGH
Makes 2-1/2 pounds dough
Ingredients
For the dough (Detrempe)
1 ounce fresh yeast or 1 tablespoon active dry yeast
1/2 cup whole milk
1/3 cup sugar
Zest of 1 orange, finely grated
3/4 teaspoon ground cardamom
1-1/2 teaspoons vanilla extract
1/2 vanilla bean, split and scraped
2 large eggs, chilled
1/4 cup fresh orange juice
3-1/4 cups all-purpose flour
1 teaspoon salt
For the butter block (Beurrage)
1/2 pound (2 sticks) cold unsalted butter
1/4 cup all-purpose flour
DOUGH
Lose weight, eat healthy, exercise, stop smoking, limit alcohol check for info viagra sale and get adequate amount of sleep in order to minimize the effects of such an intervention.
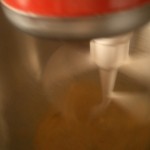
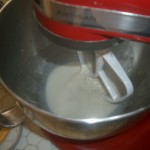
Combine yeast and milk in the bowl of a mixer fitted with the paddle attachment and mix on low speed. Slowly add sugar, orange zest, cardamom, vanilla extract, vanilla seeds, eggs, and orange juice. Mix well. Change to the dough hook and add the salt with the flour, 1 cup at a time, increasing speed to medium as the flour is incorporated. Knead the dough for about 5 minutes, or until smooth. You may need to add a little more flour if it is sticky. Transfer dough to a lightly floured baking sheet and cover with plastic wrap. Refrigerate for 30 minutes.
Without a standing mixer: Combine yeast and milk in a bowl with a hand mixer on low speed or a whisk. Add sugar, orange zest, cardamom, vanilla extract, vanilla seeds, eggs, and orange juice and mix well. Sift flour and salt on your working surface and make a fountain. Make sure that the “walls” of your fountain are thick and even. Pour the liquid in the middle of the fountain. With your fingertips, mix the liquid and the flour starting from the middle of the fountain, slowly working towards the edges. When the ingredients have been incorporated start kneading the dough with the heel of your hands until it becomes smooth and easy to work with, around 5 to 7 minutes. You might need to add more flour if the dough is sticky.
BUTTER BLOCK
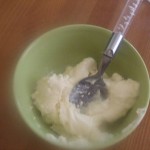
1. Combine butter and flour in the bowl of a mixer fitted with a paddle attachment and beat on medium speed for 1 minute. Scrape down the sides of the bowl and the paddle and then beat for 1 minute more, or until smooth and lump free. Set aside at room temperature.
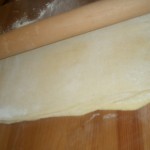
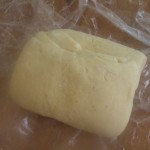
2. After the detrempe has chilled 30 minutes, turn it out onto a lightly floured surface. Roll the dough into a rectangle approximately 18 x 13 inches and ¼ inch thick. The dough may be sticky, so keep dusting it lightly with flour. Spread the butter evenly over the center and right thirds of the dough. Fold the left edge of the detrempe to the right, covering half of the butter. Fold the right third of the rectangle over the center third. The first turn has now been completed. Mark the dough by poking it with your finger to keep track of your turns, or use a sticky and keep a tally. Place the dough on a baking sheet, wrap it in plastic wrap, and refrigerate for 30 minutes.
3. Place the dough lengthwise on a floured work surface. The open ends should be to your right and left. Roll the dough into another approximately 13 x 18 inch, ¼-inch-thick rectangle. Again, fold the left third of the rectangle over the center third and the right third over the center third. No additional butter will be added as it is already in the dough. The second turn has now been completed. Refrigerate the dough for 30 minutes.
4. Roll out, turn, and refrigerate the dough two more times, for a total of four single turns. Make sure you are keeping track of your turns. Refrigerate the dough after the final turn for at least 5 hours or overnight. The Danish dough is now ready to be used. If you will not be using the dough within 24 hours, freeze it. To do this, roll the dough out to about 1 inch in thickness, wrap tightly in plastic wrap, and freeze. Defrost the dough slowly in the refrigerator for easiest handling. Danish dough will keep in the freezer for up to 1 month.
APPLE FILLING
Makes enough for two braids
Ingredients
4 Fuji or other apples, peeled, cored, and cut into ¼-inch pieces
1/2 cup sugar
1 tsp. ground cinnamon
1/2 vanilla bean, split and scraped
1/4 cup fresh lemon juice
4 tablespoons unsalted butter
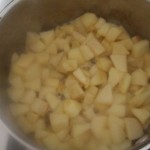
Toss all ingredients except butter in a large bowl. Melt the butter in a sauté pan over medium heat until slightly nutty in color, about 6 – 8 minutes. Then add the apple mixture and sauté until apples are softened and caramelized, 10 to 15 minutes. If you’ve chosen Fujis, the apples will be caramelized, but have still retained their shape. Pour the cooked apples onto a baking sheet to cool completely before forming the braid. (If making ahead, cool to room temperature, seal, and refrigerate.) They will cool faster when spread in a thin layer over the surface of the sheet. After they have cooled, the filling can be stored in the refrigerator for up to 3 days. Left over filling can be used as an ice cream topping, for muffins, cheesecake, or other pastries.
DANISH BRAID
Makes enough for 2 large braids
Ingredients
1 recipe Danish Dough (see below)
2 cups apple filling, jam, or preserves (see below)
For the egg wash: 1 large egg, plus 1 large egg yolk
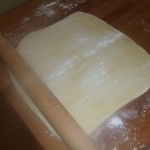
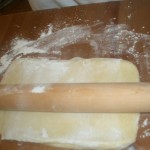
1. Line a baking sheet with a silicone mat or parchment paper. On a lightly floured surface, roll the Danish Dough into a 15 x 20-inch rectangle, ¼ inch thick. If the dough seems elastic and shrinks back when rolled, let it rest for a few minutes, then roll again. Place the dough on the baking sheet.
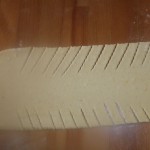
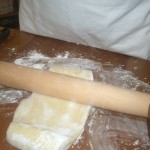
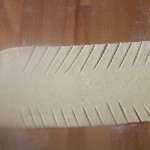
2. Along one long side of the pastry make parallel, 5-inch-long cuts with a knife or rolling pastry wheel, each about 1 inch apart. Repeat on the opposite side, making sure to line up the cuts with those you’ve already made.
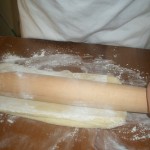
3. Spoon the filling you’ve chosen to fill your braid down the center of the rectangle. Starting with the top and bottom “flaps”, fold the top flap down over the filling to cover. Next, fold the bottom “flap” up to cover filling. This helps keep the braid neat and helps to hold in the filling. Now begin folding the cut side strips of dough over the filling, alternating first left, then right, left, right, until finished. Trim any excess dough and tuck in the ends.
Egg Wash
Whisk together the whole egg and yolk in a bowl and with a pastry brush, lightly coat the braid.
Proofing and Baking
1. Spray cooking oil (Pam…) onto a piece of plastic wrap, and place over the braid. Proof at room temperature or, if possible, in a controlled 90 degree F environment for about 2 hours, or until doubled in volume and light to the touch.
2. Near the end of proofing, preheat oven to 400 degrees F. Position a rack in the center of the oven.
3. Bake for 10 minutes, then rotate the pan so that the side of the braid previously in the back of the oven is now in the front. Lower the oven temperature to 350 degrees F, and bake about 15-20 minutes more, or until golden brown. Cool and serve the braid either still warm from the oven or at room temperature. The cooled braid can be wrapped airtight and stored in the refrigerator for up to 2 days, or freeze for 1 month.
Additional Resources:
Baking with Julia by Dorie Greenspan. There are a variety of filling recipes that work quite well for Danish Braid.
Danish Pastry technique on YouTube. http://www.youtube.com/watch?v=Yg-zXn_Y … re=related Interesting general information on laminated dough (not specific to our recipe or Danish Braids).
PBS.org – Julia Child: Lessons with Master Chefs
http://www.pbs.org/juliachild/meet/ojakangas.html#
Video cut for a Danish Pastry Braid by Beatrice Ojakangas who is the featured baker of the Danish Braid recipe in Baking with Julia by Dorie Greenspan. Great information.


12 comments on “Daring Bakers Challenge #4 – Danish Braids”
Wow… all the pictures and all the helps you get… I wish I had yours when I was making mine:)
What wonderful filling combinations. Great job!
I loved your post!!! So vivid and detailed, I felt as if I were baking right there with all of you!!!!!
One day soon enough they will come to realize that you didn’t ruin perfectly good fruit by adding brie….oh to be young again but then I wouldn’t know that your filling had to be out of this world!!
Congrats on best filling I have seen!!!!!
Beautiful…I love the photo series!!
Wow… you are so brave to attempt this anytime near our heatwave! I love figs so I’m drooling at your pictures. Too bad I don’t see you everyday anymore!!
110 degrees and you still managed to make a wonderful danish braid! Well done. And your brie cheese makes my drool! Can’t believe I didn’t think of that myself. Love it!
AWESOME. Love your filling.
Well done and in the temps you had too!
Great job despite the weather. Many members have the same initial reaction, but wasn’t this challenge fun?
Thank you for baking with us 🙂
Wow I love the photo block- looks like you had a great time. Sorry about the heat- I used to live in Hell A too 🙂
I love the idea of the dough bits wrapped around the single cherry- sounds grand! Nice job!
Great job! And what fun to make it with family.
I love, love LOVE the intriguing and exotic flavor combinations you chose. Great job!